To create a user’s Self-Service account, go to Self Service > Users, then click the + button. Select Identity as the creation store, then click Next. 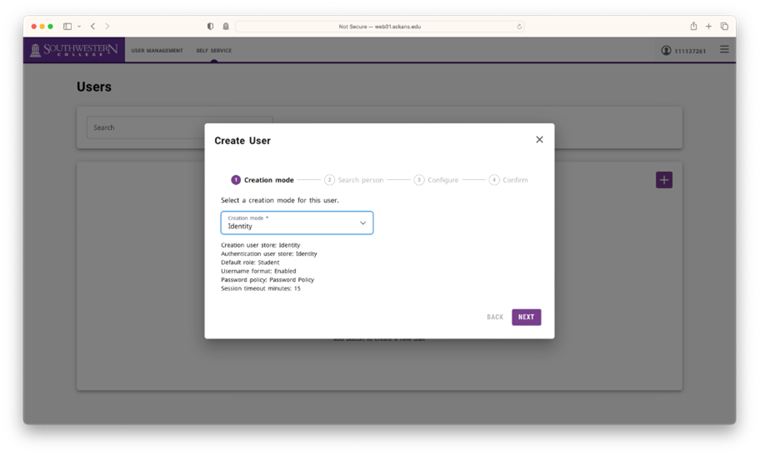 Search for the user by name or ID number, then select their name from the list below and click Next
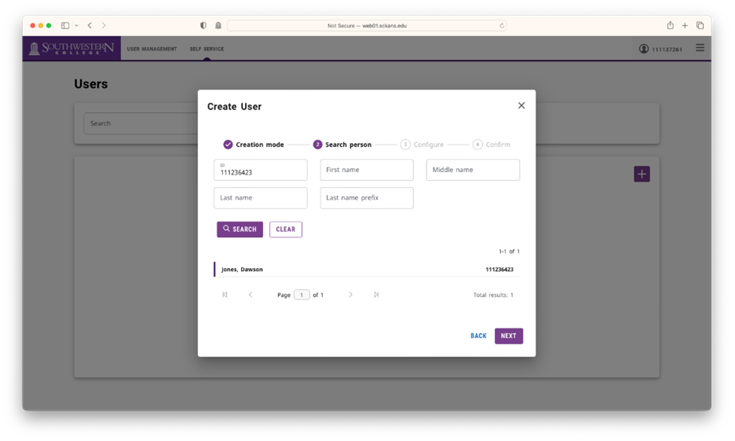
Confirm that the user’s information pulls across correctly at the top of the window that appears, then click Generate Password and check the box to Require a password change at next logon, then click Next.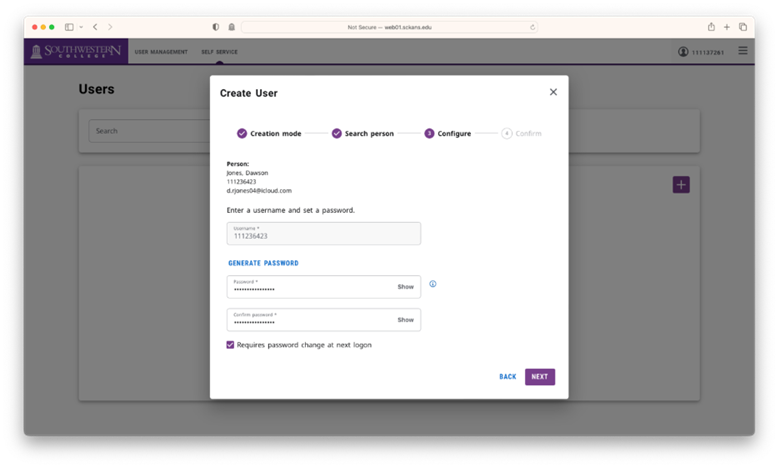
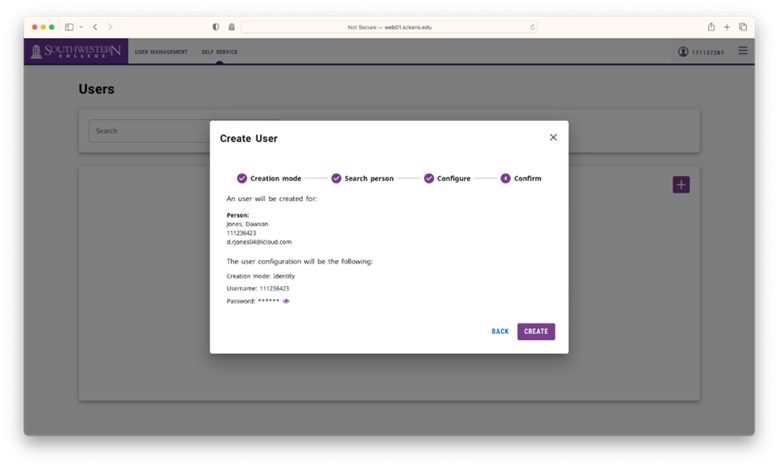
Confirm the user’s information again, then click Create to create the user’s account. The user will receive an email from do_not_reply@sckans.edu containing their temporary password.
Was this article helpful?
That’s Great!
Thank you for your feedback
Sorry! We couldn't be helpful
Thank you for your feedback
Feedback sent
We appreciate your effort and will try to fix the article