Complete the Verify User Process. If the student has no SC ID number have the student contact the registrars office (registrar@sckans.edu) to request their Student ID number
2.) If the user cannot log into Self-Service, and was unsuccessful resetting their password, determine if they already have an account.
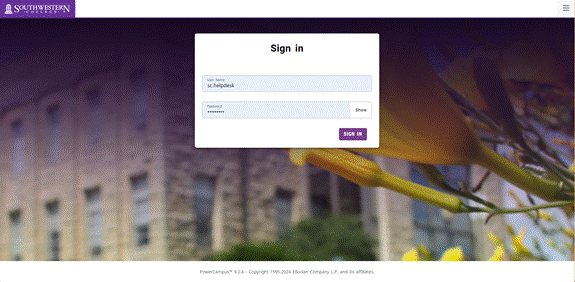
3.) Log into Self-Service as SC Help Desk (sc.helpdesk). SC Help Desk has a role of Admin Lite.
Username: sc.helpdesk Password: ***************
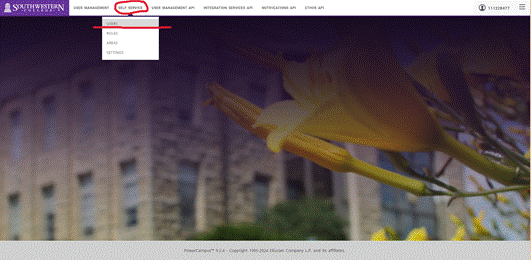
YOU WILL ONLY BE ON THE SELF SERVICE >> USERS TAB !!!
4.) Once logged in, click on Self Service > Users. Type the ID in the search box. Click Search. If you can’t find the user and they have an SCID you will need to create their account go to step 6.
Once you found the user click the three dots under Actions >> click reset password. Reset the password to Jinx2024!
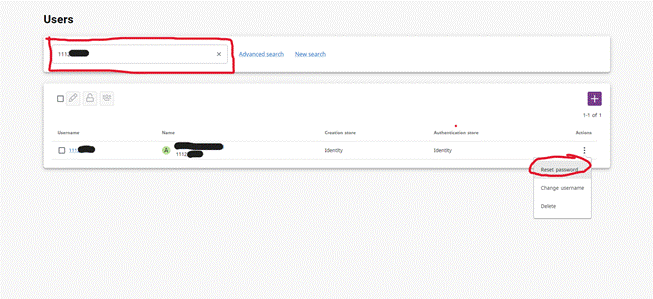
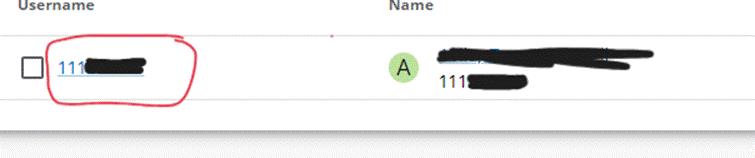
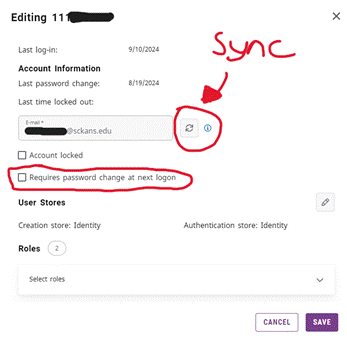
5.) After you reset their password click their SC ID number >> click sync their email if it isn’t showing their SC email >> check the “Requires password change at the next logon” box >> then click save.
Once finished, email the credentials to the user use this response:
We have reset your Self-Service. Please use the following credentials.
Self-Service
User: Your StudentID #
Password: Jinx2024!
You will be asked to change your password once you sign in.
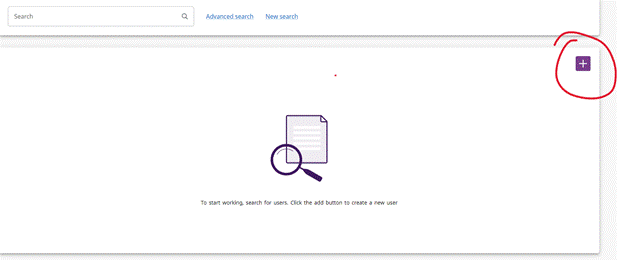
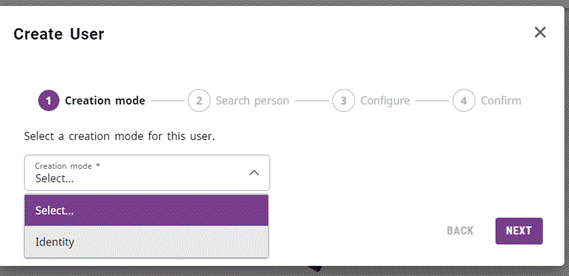
6.) If their account doesn’t exist you will need to create it. Click the plus button >> select Identity.
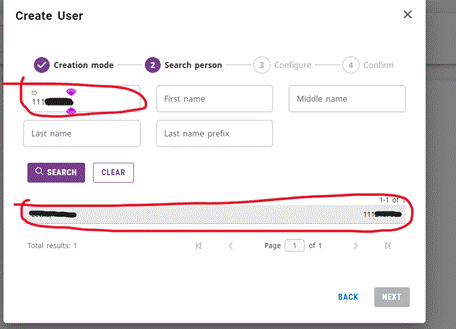
7.) Put student’s ID number >>Click Search >> once you found the student click their name and set a temporary password or click generate password >> check the “requires password change at next log on box >> click next and create their account.
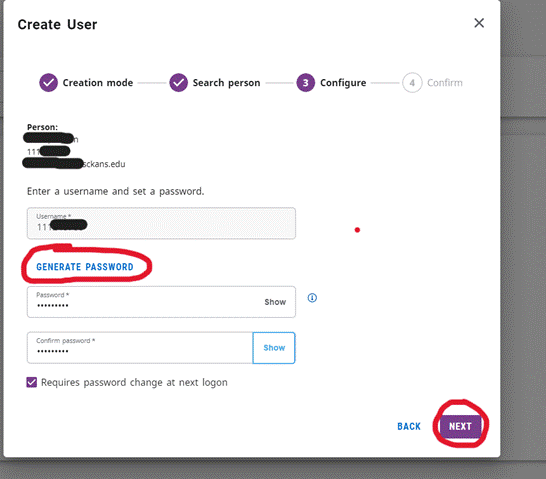
8.) The system will send an email to the user. Have them check their Inbox or spam/junk for a message from do_not_reply@sckans.edu. If their email address is incorrect or they would like to use an alternate email address, please have them contact the Registrar’s office.
9.) If they still don’t receive the email, tell them their credentials. The following steps are for the user if they need help.
13.) Once they get the email have them Copy the temporary password. Make sure they don’t copy it with any leading spaces. The temporary password will not work with a leading or trailing space.
14.) Have them click on the link in the email for Self-Service. Have the user log in with their username (111xxxxxx) and Paste the temporary Password.
15.) On the next screen Paste the temporary Password in Current Password.
17.) On the next screen have them click on Self-Service Home. Now they are logged in with their new password.
Was this article helpful?
That’s Great!
Thank you for your feedback
Sorry! We couldn't be helpful
Thank you for your feedback
Feedback sent
We appreciate your effort and will try to fix the article